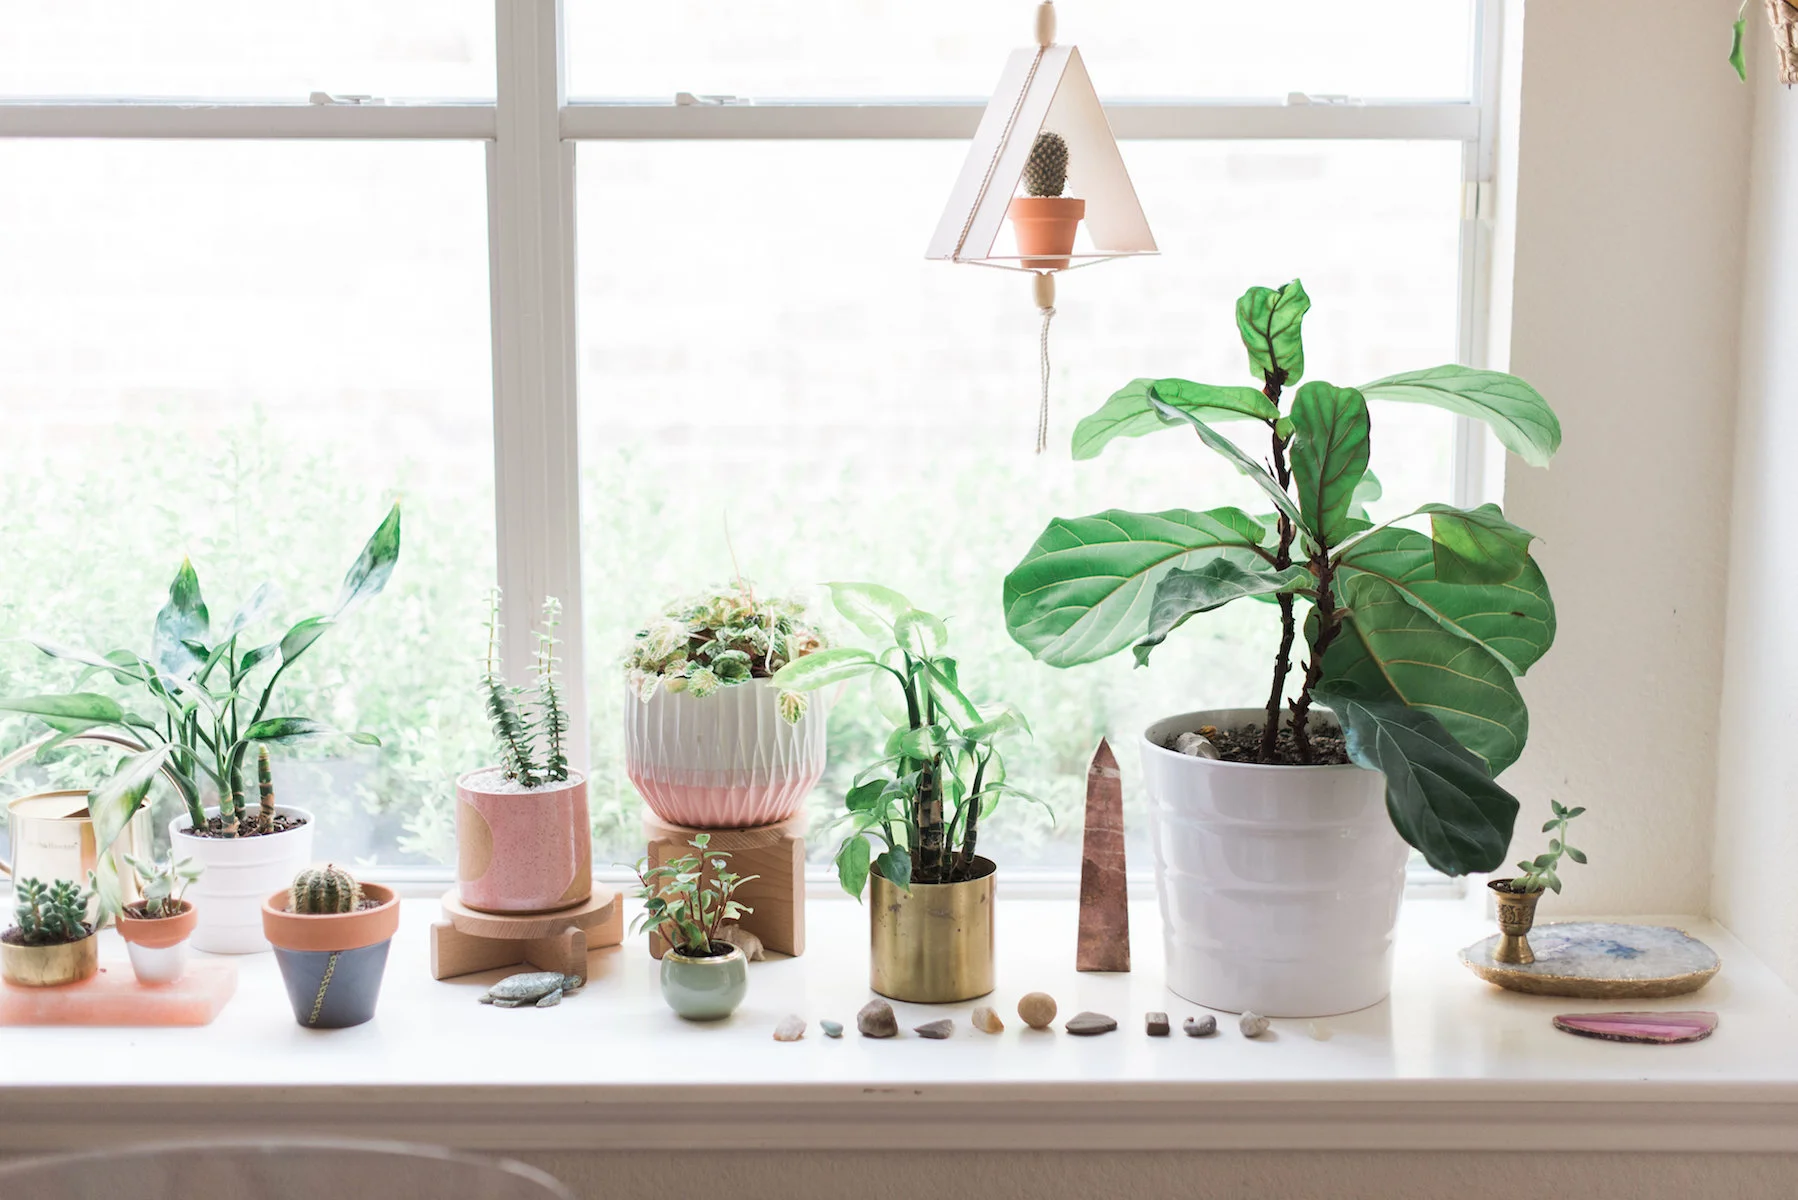
As a self-proclaimed introvert, one of my favorite things to do when I need some quality "me time" is come up with fun DIY projects that will bring warmth and personality to my home. A great way to do that, personally, has always been with plants! Not only do they add a pop of color to any space, but they actually have been proven to make you happier! Several studies have shown that having potted plants in your home can improve your well-being and raise productivity. Now, I'd never call myself a plant expert—but you can't argue with science!
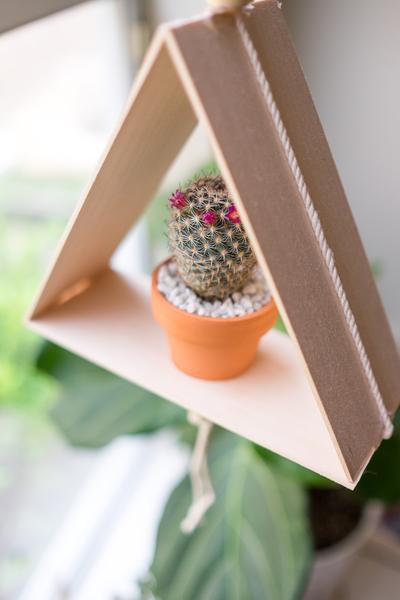
Plant hangers have been all the rage lately... and I'm on the bandwagon y'all! (check out this hanging macramé planter I made a couple weekends ago.) So, when I adopted this adorable baby cactus from Home Depot (they've got cute stuff!) I knew I wanted to find a way to elevate her in a little terracotta pot so she could get the extra sunlight she needs and deserves :)
Here's what I came up with— I hope you guys enjoy!

DIY BEADED TRIANGLE PLANTER
PROJECT TIME: 1 HOUR
SUPPLIES
Ruler
Pen
Power Drill
1.75" Drill Bit
Rope
Wood Beads (similar)
Hole Saw (similar)
Balsa Wood
X-Acto Knife
Plant (similar)
Mini Terracotta Planter
INSTRUCTIONS
Measure and mark your piece of balsa wood into three equal parts. I used one piece of wood measuring 36", so each side of the triangle ended up being 12" long. Then, use the X-Acto knife to carefully cut along the lines. Pro Tip: Using pressure, slice the balsa wood slowly to prevent splintering.
Now you're ready to pot your cute succulent (or a similar plant that does well with your indoor lighting) in your mini terracotta pot. You could even jazz up your pot with a little bit of paint before placing it in your adorable new beaded triangle planter!
Wrap the single strands of rope around the wooden triangle tightly, add another wooden bead (or two), and secure with a knot. Cut the ends of the rope to your desired length.
Next, take your rope and fold it in half. Pinching the fold, measure how long you want your planter to hang down. For example: if you're hanging it from the ceiling, you will want a much longer piece of rope than if you're placing it on the end of a curtain rod. At that point, knot the rope and string a wooden bead on the looped end.
After all your cuts have been made, put your three pieces of wood together in the shape of a triangle, gently pressing the notches together like puzzle pieces to form a seamless shape. Pro Tip: I used a couple dabs of hot glue inside each notch to help hold it together.
Find and mark a dot in the center of one piece of wood. Using a hole saw attachment, drill a hole for your planter to rest in. Since my wood panel only measured 2" wide, I used a 1 3/4" drill bit and found mini terracotta pots that would fit inside.
Once you have three equal pieces of wood, measure and cut notches into the top and bottom of each piece. I measured a 1/4" from either side and 1/4" down. These grooves will "lock" together and add overall stability to your planter. After these measurements have been traced, cut along the lines using your knife.


INTERESTED IN LEARNING MORE ABOUT HOW I MAKE MY STOP MOTION VIDEOS?
Here's a little behind-the-scenes on how I planned out this D.I.Y. stop motion video for you guys. Before shooting, I always map out each scene on my sketch pad so that I know exactly how to style and animate each step of the project. It also helps me during the editing process, so that I know where I wanted to include text overlays and can easily identify the order of the photos.