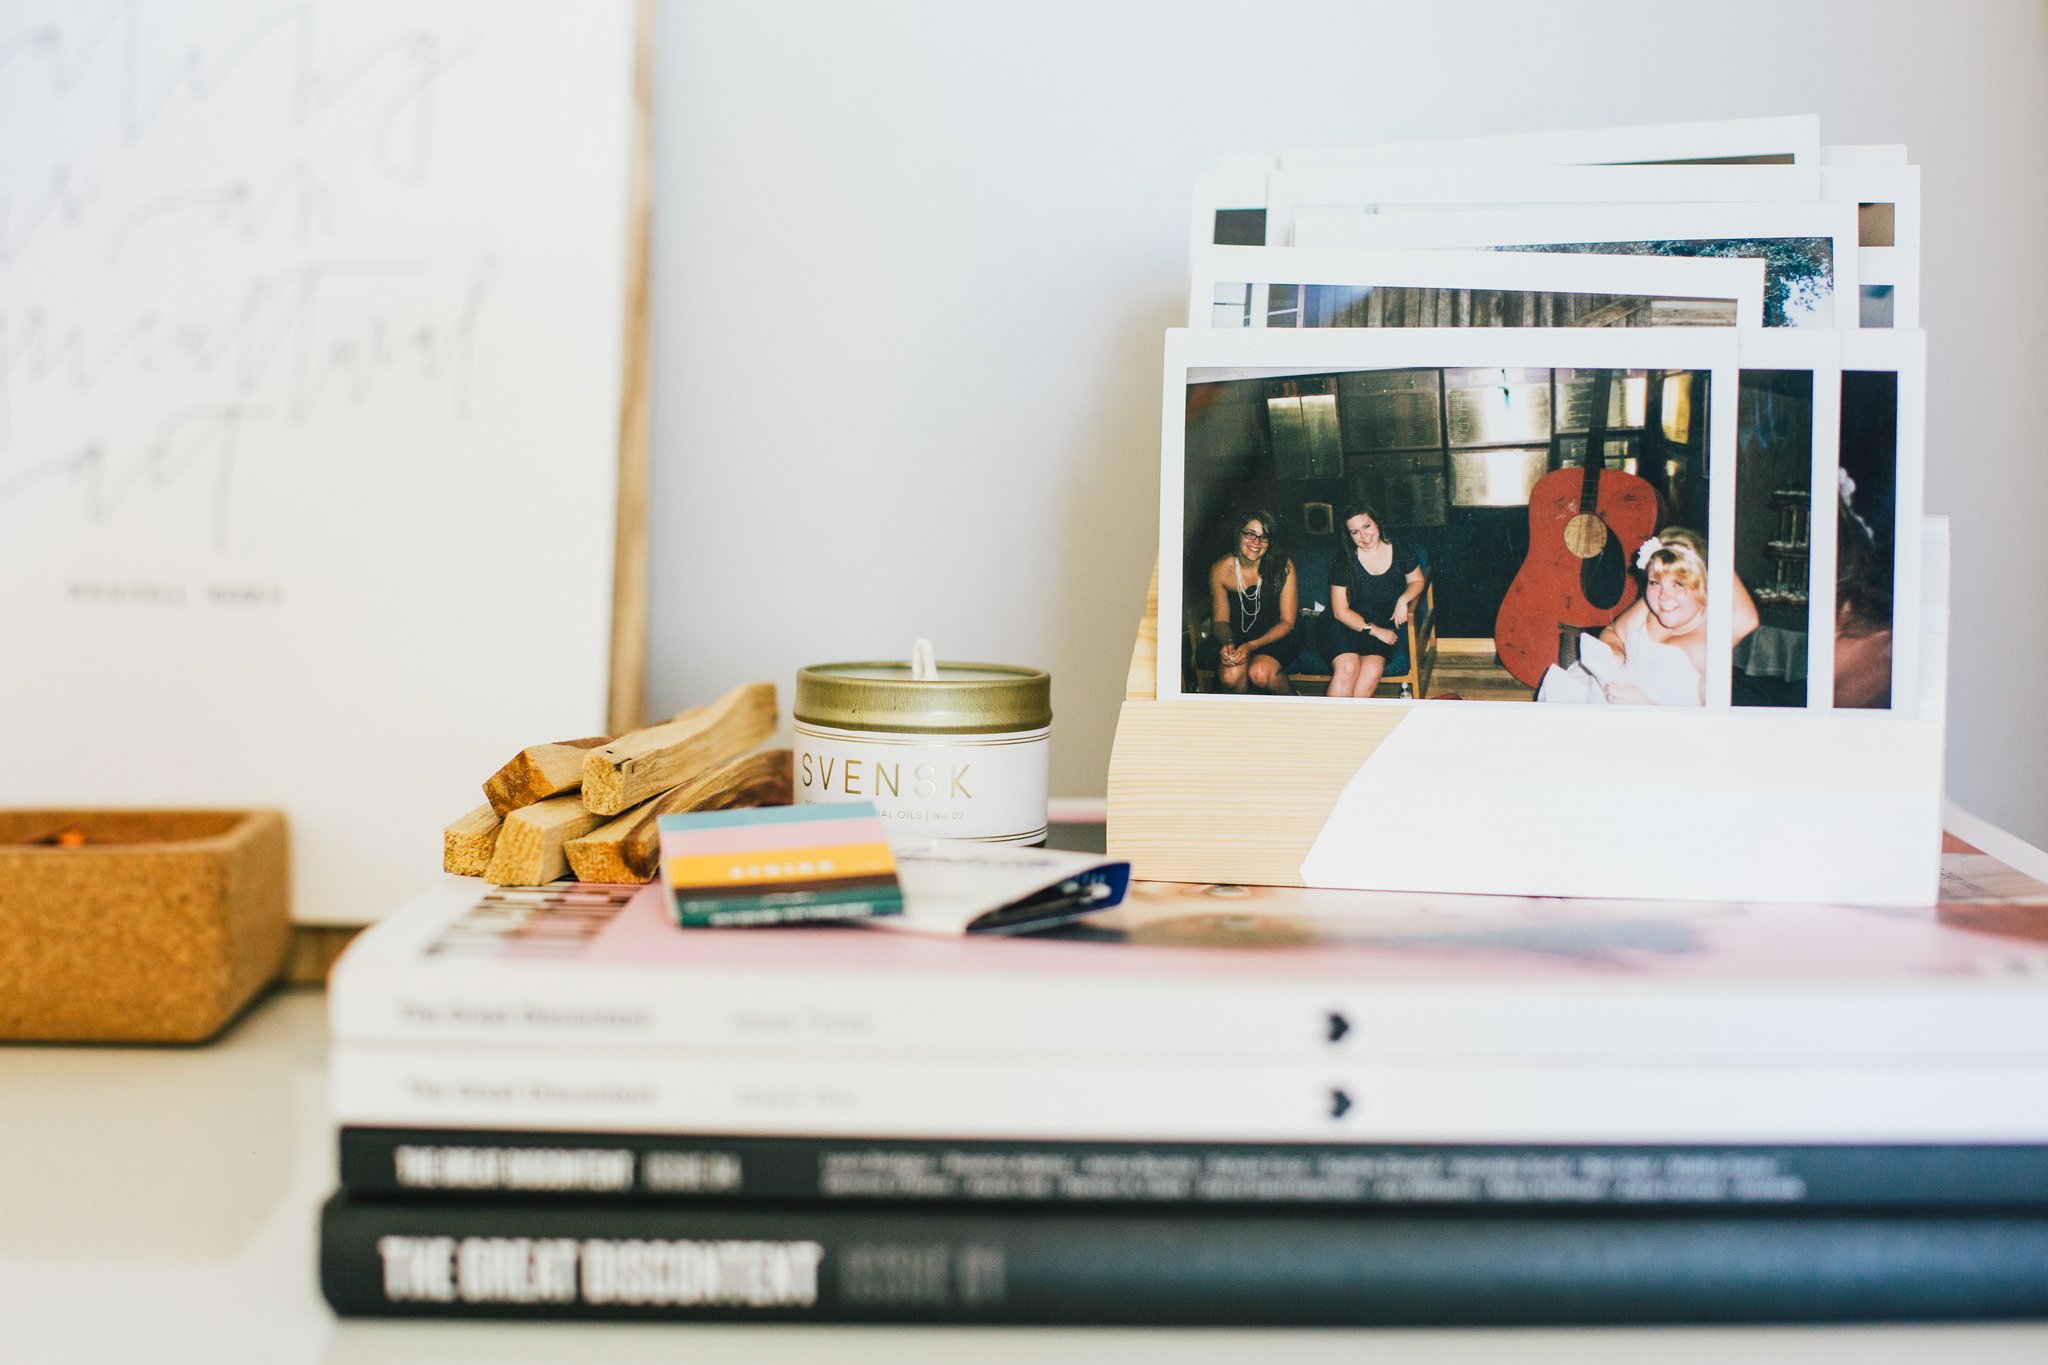
You may have seen the Happy Workspace Spruce I did for @ohhhchelsea Iast week, where I mentioned this super cute + super modern DIY. It's the perfect way to showcase your favorite Poloroids or Instax memories! This project requires a few basic woodworking tools, but once you get started you'll have a color-blocked wooden photo holder in less than 20 minutes.
DIY WOODEN PHOTO HOLDER
Project Time: 20-30 minutes
SUPPLIES
- (2) 2x4s, cut to 6" pieces
- Wood Clamp
- Painter's Tape
- Wood Glue
- Table Saw or Hand Saw
- Spatula
- Pencil
- Acrylic Paint (in your favorite color)
- Danish Oil (optional)
- Ruler
- Paintbrush
- Poloroid, Instax or Photobooth Memories
INSTRUCTIONS
- Apply glue to one piece of the wood, and smooth out the glue evenly with the spatula.
- Clamp the two pieces of wood together. Let dry up to 1 hour.
- Draw evenly spaced, stair-stepped lines for the photo slots. Saw out each slot carefully.
- Use the ruler to trace a 45 degree angle along the side of the block, and use your saw to create a slanted edge.
- Tape off a cool color-blocked design and paint your wood block. *Optional: apply Danish oil to the natural, unpainted wood for a deep wood grain finish.
- Let dry at least 1 hour, and then style it with your favorite snapshots!